

How to use the Manual
Quick Guide
Video Tutorial
Iceberg Features
In-depth analysis
Brokers
Data Feed
Other Manuals of beeTrader Trading Platform
How to use the Manual
Quick Guide
Video Tutorial
Iceberg Features
In-depth analysis
Brokers
Data Feed
Other Manuals of beeTrader Trading Platform
 Aggiungi questa pagina al tuo libro
  Rimuovi questa pagina dal tuo libro
 Questa è una vecchia versione del documento!
Iceberg in this section provides the user a simple but powerful system to automate the trading in options. It also allows to non-programmers to create set certain moves which will be executed automatically. For users with more knowledge a scripting system will be available.
 | 24/03/2016 | Planning - L'area di lavoro | 6:22 |  |
| 24/03/2016 | Planning - Il grafico del futuro! | 9:35 | |
| 24/03/2016 | Planning - Esempio di Utilizzo | 6:53 | |
Click here to watch other Video di Iceberg

 | It open the submenu Strategy | |
 | It creates a new Strategy | |
 | It allows to open a previously saved Strategy | |
 | It allows to save the Strategy currently in use | |
 | It opens the window Strategy Settings for the strategy settings | |
 | it open the window What-If History where there are stored all the transactions carried out by the function What-If | |
 | It enable or disable the Planning function, whether the button is highlighted the function is active. |
 | It create a new Plan for the Strategy |
 | It allows you to edit the selected Plan |
 | It delete the selected Plan |
 | It confirm the changes made to a Plan |
 | It cancel the changes made to a Plan |
 | It allows you to enter the starting point of the Plan |
 | It allows you to enter the end point of the Plan |
 | It allows you to insert a condition in the Plan |
 | It allows you to enter an action in the Plan |
 | It allows you to place an hub for the links of the Plan |
 | It allows you to insert a link between the starting point of the Plan and the condition, between the action and the end point and between actions. It connect the components of a Plan which are not subject to a decision (Yes or No) |
 | It allows you to insert a link between conditions and actions, in case the condition is verified |
 | It allows you to insert a link between conditions and actions, in case the condition is not verified |
 | It delete the selected object of the Plan |
 | It allows you to move the selected item to the first level, therefore in foreground |
 | It allows you to move the selected item to the last level |
 | It allows you to advance the selected object of a level |
 | It allows you to move down the selected object of a level |
 | It reset the zoom |
 | It start the Plan Test |
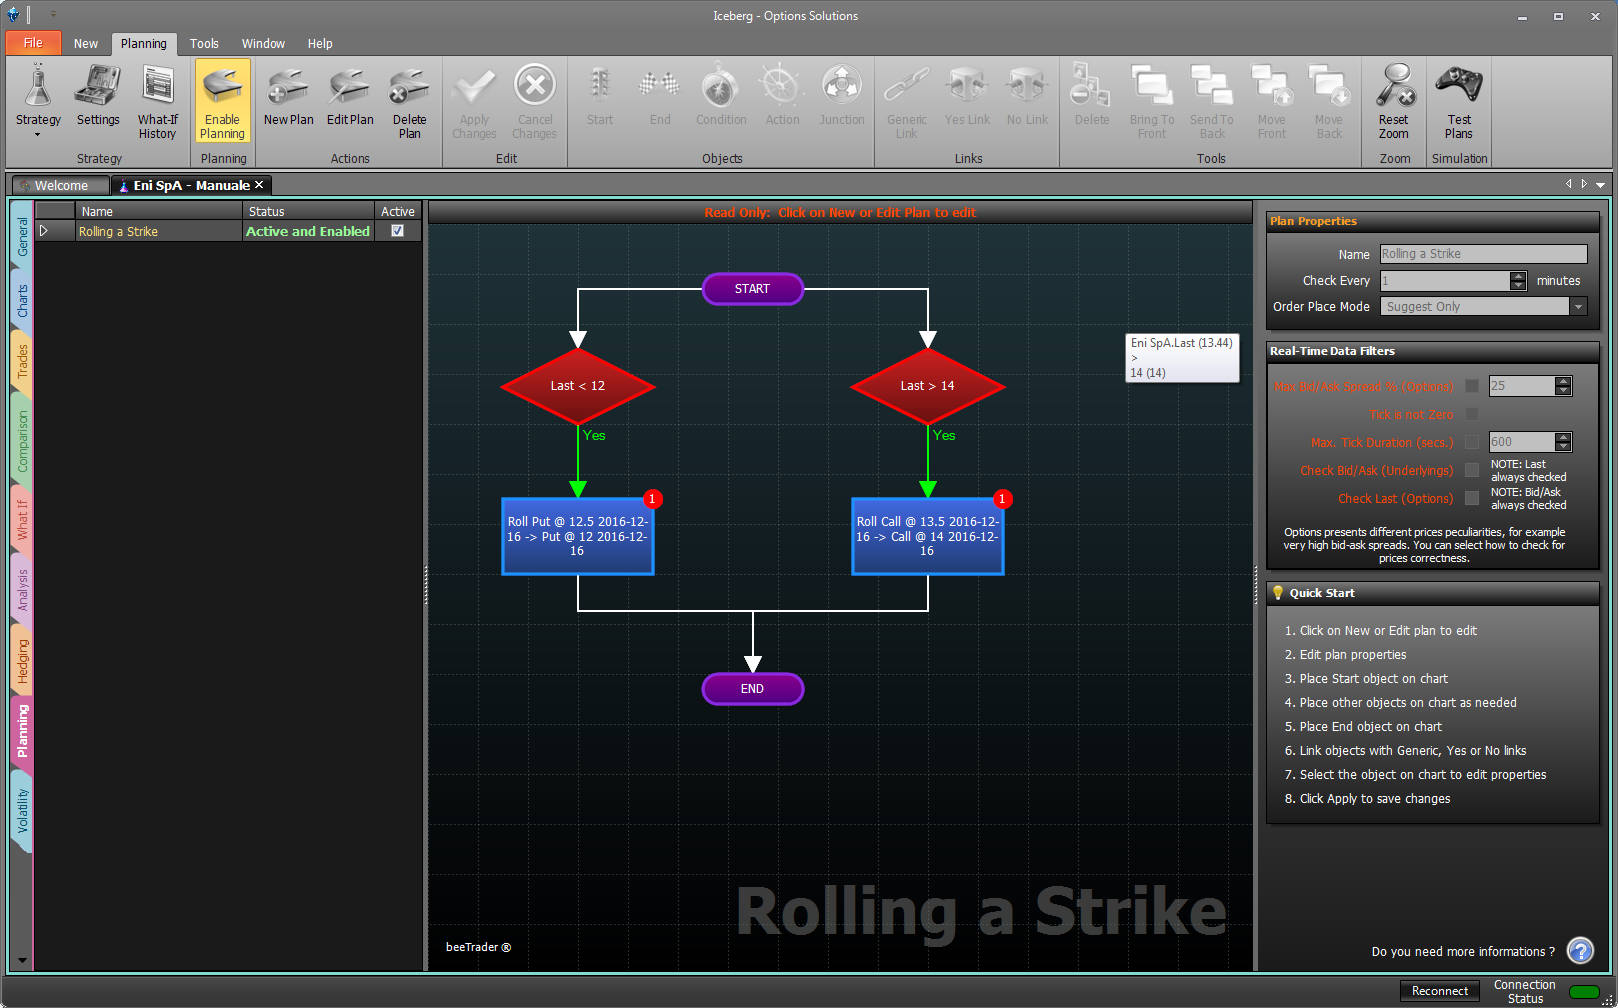
A Plan consists of various objects that indicate the logical sequence and then how the sequence will be evaluated and executed. We see below what items make up a Plan and their properties.
By clicking the button  you can enter the Start object
  .
.
 When Start object is selected, as well as the End object, it appears a sidebar with the general settings of the Plan.
You can only enter a Start object into the Plan, which must be concluded with an End object but you can enable more Plans at once.
By clicking the button  you can enter the End object
  , which must be entered to complete a Plan.
When Start object is selected, as well as the End object, it appears a sidebar with the general settings of the Plan where you have to set its name and how many minutes must elapse between a check of the plan and another.
By clicking the button  it is possible to insert the object
  , which contains the condition that will have to be verified. From a Condition object can exit a “Yes” link, which will be connected to the action to take if the condition is verified, or a “No” link, which will be connected to the action to take if the condition is not verified.
 When “Condition” object is selected, a sidebar with the settings will appear. You have to complete the field.
Operand 1: you have to assign the first term of the comparison, It can be a property of an Asset, a property of a Strategy, a property of a Plan or a Custom value setted by the user;
Operator: You have to choose the mathematical operator;
Operand 2: you have to assign the second term of the comparison, It can be a property of an Asset, a property of a Strategy, a property of a Plan or a Custom value setted by the user;
Object Text: in this field you can assign a short note that will be displayed in the Plan within the object Condition;
Preview: it shows shows the preview of the selected condition.
| In base al tipo di strumento selezionato in Operand 1 e Operand 2 alla voce Type, il sistema propone eventuali Which e le relative Property. Se per esempio viene selezionato il Type Asset il sistema propone tra i Which le gli Asset disponibili, quindi il sottostante, le legs o i futures. Una volta selezionato il Which voluto nelle Property il sistema propone l'elenco delle proprietà disponibili per quel particolare Which. |
| Type | Which | Property |
| AssetsProperties | Legs of the Strategy | Proprietà della Legs della Strategy selezionata |
| StrategyProperties | - | Proprietà della Strategy |
| CustomValue | - | Valore impostato dall'Utente |
| PlansProperties | Scelta del Plan | Proprietà del Plan selezionato |

 Mostra, modifica libro (
 Aiuto
Aiuto